Malware Reverse Engineering
Show original YouTube description
Show transcript [en]
[Music] [Applause] [Music]
so hassan will be more than happy to share it and there and from there you can ask your questions couple of things that i think you please keep in mind if you don't understand anything please make sure to write a question in the discord and hassan will be forwarding it to me and i will i will try to answer it as soon as possible and second thing so regarding accent or anything you words you don't understand please make sure to mention in the discord channel so next thing so let's start okay so so by introduction so my name is muhammad ishad and i'm currently working at talos cisco singapore as a lead research engineer so where we create detection
for most of the apt vulnerabilities and the malwares
previously
so
hello can you hear me properly
hello
okay so sorry there were some issues related to the wise i think the video on the youtube is lagging behind okay so okay no lag no that's that's good that's good okay awesome so so let me introduce myself uh my name is rashad muhammad sorry if you are hearing it again and again there was a lagging in the video and so for example currently working in cisco previously worked in fire eyes so most of my work have been focused on malware analysis reverse engineering detection so these are a couple of my research blogs that you can go and look for if need and and you guys if you have any questions please forward it to discord channel other than
that if you need if you think that there's something i can help you with guys please feel free to reach out to me on twitter and linkedin we will be sharing these slides right after this presentation ends at the google drive link that must have been shared with you if it is not shared with you we will provide it to you and from there you can reach out to me on twitter or like so let's move on so many thanks to muhammad hassan he's a security engineer at a breaks and he's he will be helping you guys throughout the workshop he will be monitoring the discord channel please make sure if you don't understand anything or there is
any accent issues that are the words that you don't understand please make sure to mention it on the discord okay let's move so from now i would like to like invite muhammad mumbai who is the second instructor of this workshop to introduce himself and he will also be going through a table of contents for this workshop over to you oh man
can you stop sharing your skin
okay uh so once again okay so assalamu alaikum guys uh so i'm my name is muhammad and i'm going to be your second instructor today uh for the malware analysis workshop um a little bit about me so that's right there in the corner and that's both of your instructors ishad and yours truly uh so i graduated from from nast uh and i right out of university i started uh my job with ebrix uh working indirectly for the fire eye team uh i work about uh four years with them uh primarily primarily in the windows internal research and uh development team uh then i moved on to pharah labs in singapore i worked for close to three years there and my
primary responsibilities were malware reverse engineering apt hunting detection engineering uh so on and so forth uh these days i work uh for kaspersky's global research and analysis team so you might have heard of these guys these are the guys who discovered equation group worked on stuxnet flame so equation group was the apt that's allegedly linked to nsa so nice fellas to work with so uh uh yeah and if you want to you can reach out to me on my twitter handle and like rashad said any issues that you have please do try to raise them in the chatroom and hussan should pass them on to us moving on so i'll give you a brief overview of uh what you can
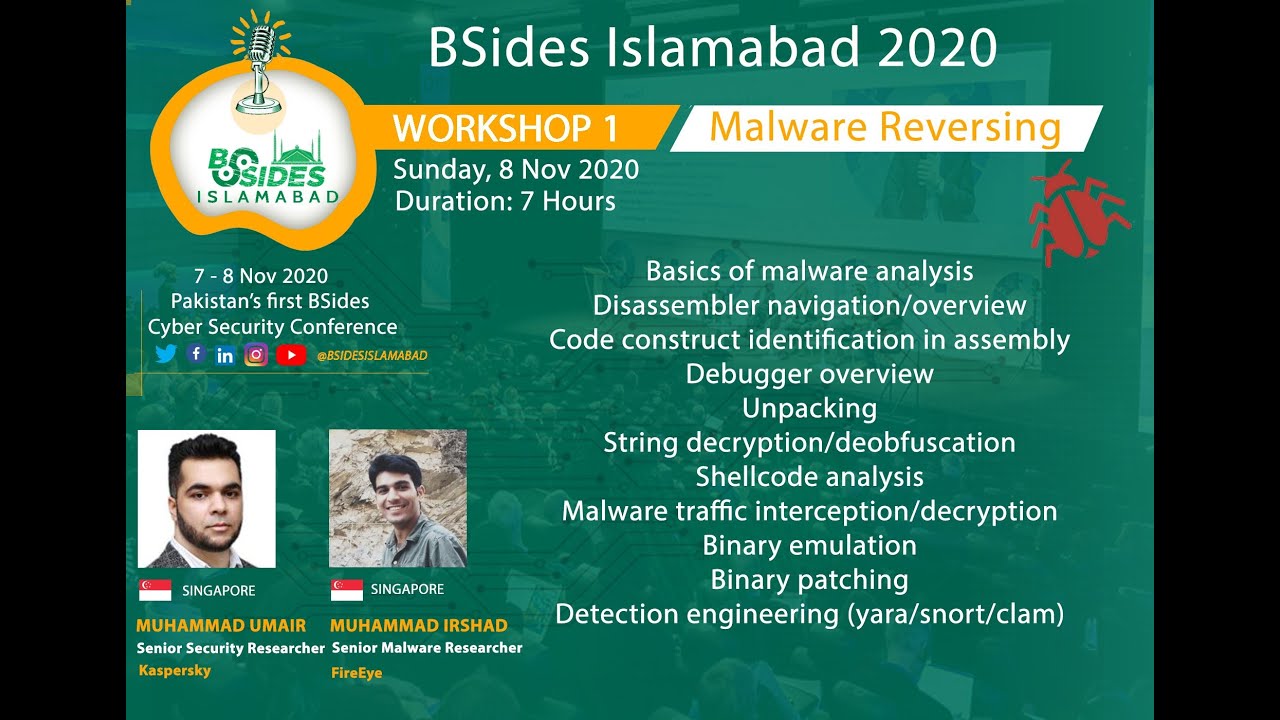
expect in the workshop so we're gonna divide all of this content up in two days um first irshad is going to go over some of the fundamentals and also some of the advanced stuff it's going to include basic static analysis show you how to create the malware then go over some assembly stuff uh show you how to recognize particular code constructs within assembly uh he'll also go over some debuggers and show you how to use them uh then shellcode analysis which is basically position independent code and on it's not exactly advanced but somewhat scenario based stuff i'll try to go over some scenarios for you i'll try to provide you enough information so that you don't get confused and then
i'll walk you through them so one of those will be uh how exactly do you set up a network environment to interact with a trojan or a backdoor and how you intercept the traffic and how you proceed on exchanging commands with it that's going to be our first topic then we'll also go through some binary unpacking look at some common packers look at some techniques i will also go through some binary patching both static and dynamic patching and finally the last topic would be binary emulation and one of its use cases at the end of it depending on how much time we have left we will also go through detection engineering and see how exactly you write
uh yara rules for either for detection or for hunting and similarly uh some snot rules so the way we've tried to structure this workshop is that we want to deliver to you uh some fundamentals of course but we don't want this to be uh though a generic sort of workshop that you can get on other youtube channels or videos or other exercises that are floating around so we also wanted to give a hint of the normal the usual uh problems that a malware an analyst or a reverse engineer faces on a daily basis uh so that's where the scenario based exercises will come in so with that i'll transfer over to rashad so he can start
with with his earlier topics
myself thank you very much for giving the giving the contents telling us the contents of the workshop so let's start so okay so there are some key points that i want to go through before we start the material so this workshop is bigger geared toward beginners so if you have just started in the malware analysis are just working are trying to find a way how to properly uh propagate yourself in this career so this workshop is for you we will cover more some of the advanced topics but advanced topics are not the main focus of this workshop so if you're already a seasoned malware researcher uh you might learn some things but most of thing will be the basics for you
and secondly we will provide hands-on labs and that you can go through and we will go through at least six such several labs during this workshop if the time permits and the main thing that i wanted this workshop to deliver is the direction that you can take in order to be a better malware malware analyst so we will be providing reference to important sources throughout the workshop also most importantly sometimes i will provide sources on per slide basis so my goal goal would be to give you the basics idea and touch some of the advanced topics and after that guide you towards a resource that gives you detail to both basics and the advanced in a very detailed manner so yep that's
the second thing i want so many of the guys attend the malware analysis workshop and after that they think they know the malware analysis now malware analysis is all about practice practice practice so if you don't practice and you think your malware analysis you know malware analysis you're fooling yourself even a guy that me and no matter that we are working it took us three to four years to get at a very comfortable level so again no practice no learning so please practice all of the workshops and during the uh during the slide i will also refer you to the links so please do all of those workshops are the material also so let's move on so let's just
start with the what is the malware so any piece of code that is designed to harm a programmable device is called a malware so it can be any programmable device if it's proposed to harm steel do something bad on that device it will be called malware pretty generic term uh there are many types of the malware worms boards ransomware and a lot of other types and but one thing i just wanted to clarify not every malware is a wire so most of the time the people who are not very familiar with the malware analysis they think everything is a computer virus virus is just one type of the malware and that basically a latch itself to
some already pre-existing file something so pre-existing file or some benign file it's more like act like a leech latch itself and whenever that file is run the malware will also execute couple of things that we will be going what i'm going to do is okay one second
okay so if at the bottom of the screen you will see you will see links so these are the basically links so what are the types of you can basically go to here i have added a link for the different types of the malware so you can go through them after the workshop so these are pretty self-explanatory but i highly recommend that so this is the reason that and second thing is like if these are two links so these are all discoverable uh to discuss the different types of the malware that we will be analyzing so that's my my goal towards providing you with the links so please go through them and they're all very basic let's move on
to the next part so okay so next thing so you might be wondering why should we learn the malware analysis and what is the basically what's that reward so it's a niche market so there's a lot of job opportunities i know the guys who are world activities who get three four interview offers every month and the salaries are exceptionally high so if you know i have written some of the salaries range you can guys if you're from pakistan you guys can convert to these to pakistan they range anywhere from 6 000 lakh per month up to 15 to 20 lakh per month depending on the region you are working in so the very high salaries if you are
good at malware analysis and it's a very high demand so but there is a catch malware analysis why are there so much high salaries why there are so few kind of malware analysis is not easy to learn it's an ever-changing field the things that you will learn this year might be obsolete in two to three years so you have to be in a continuous you have to be learning continually and it also requires fundamental knowledge of many of the basic fields such as windows assembly so you will be mostly dealing with the low level lower low level code and it's it's required a lot of effort and concentration to work at that level so these are the catch but believe me
these are not hard to overcome it just there's an initial barrier once you overcome that you will be cruising through the melody analysis okay so the process of the malware analysis so basically there are two actual main stages of the man-made analysis basic analysis and a static analysis in the dynamic analysis in the static analysis if you don't run the malware you try to analyze the malware without running it in dynamic analysis you run the malware and you try to observe the behavior of the malware so these two steps are further divided into four steps basic static analysis basic diagram so you start with the basic dynamic analysis so we will go through these each of these in detail later so
as here you just use some tools to you use some tools to uh
you can use some tool basic tools to go through the and find out what the malware basically does what are the strings then you the basic dynamic analysis you run the malware in the sandbox you run all your machine and so to observe what type of files it creates does it does it interfere with any registries and then we move on to the advanced dynamic and the static analysis so these two advanced dynamic analysis and then on static analysis so these are these two will be inter so you will be doing them at the same time so you're in advanced static analysis you open the file in the ida pro or any this is somewhere depending
on the type of the file you're analyzing and it was dynamic analysis you basically open the file in advance in debugger and you will be looking at the dia static analysis disassembler and executing the code on your debugger and kind of entering it so we'll go into the detail later so okay once again okay awesome so let's move on to next p file format so here this section will focus on the pe file format so p file format anytime like whenever you go into the windows you must have seen dot exe files all of the most of the windows files are dot exe files so these that stuff they follow a specific format and that format is called pe file
format it is used by both 32-bit and the 64-bit and in reality the file format is basically it's just a data structure uh most likely if you are familiar with the c plus c or c plus plus struct so struct it's basically a struct a complex truck that encapsulates all of the information that is required by the loader to execute the to basically execute to load them to let the binary in the memory and execute it so it was developed by mark zibuski so mz you will at the start of the every pe file you will see the mc header that basically refer to the markup he's the guy he was the architect you know software architect at the
microsoft in the 90s so let's move on to the basic structure so on your right so on your on your right you see the basic structure in our diagrams on the top we have the dos nc header so dos mc header so and dostop these two are basically reminiscent of dos era so many of you guys might have worked on the dos if you were anywhere if you were if you were kids in the 90s so the dos was basically uh whenever if there is a program that runs the if you try to run the executable a dot xv file in a dos it will show just show you us uh output on the command line
that this program cannot be done in the dos mode okay that's that's just for there after that the pe file header this is where the real fun starts so this is the actual binary star the pe file had a contains information about all of the pe files are where most of the details where it will be headed and all of the important fields are present in the pe header and then after that there is a section table so data the most important data that loader will need the actual data is present in the sections section 1 section 2 there can be as many section as possible and and so the contains like up to usually three or four sections
quite common and the section table is basically provides the metadata of all these sections which will it will have size details it will have virtual sizes so we'll go into the detail later so one of the key thing that i mentioned is like we are again so if you go there so this is the code breaker magazine so this is one of the most extensive one of the most extensive uh reference for the pe files so please refer to it if you have any questions any confusions please refer to it if you don't understand please feel free to for reach out to me on the or reach out on discord okay so let's move on
so common sections in pe file okay now we are going to name the comment section so as uh as you go here their section so but there's a common section that need that are mostly present in pe file executable code so every program needs code that needs to be executed will be present in the executable code section so usually name dot text or code simply code depending on the compiler but and the data section so whenever you write a program there are strings there are integers uh the hard coded strings are coded integers that usually present in the data section that goes into the data section resource section so for example there are some like icons windows
some pictures anything and so anything that's the binary will need and and it's have a it's like in a large size will be stored in the resources section so for the malwares you need to keep an eye malware users they can make extensive use of the resource section in order to hide your code we will go through in the demo again for such a malware and after that the export export data section and import data section so these are named e data and i data but these two are the one of the most important section when it comes to static analysis exports we will go into these details but just for the just first like let me describe in a
simple sentence export basically uh you must have seen when you write the code you know the malloc functions or the right function f open to these functions all of these functions are usually export function they are exported from a library import data section so it contains information all the function that binary uses the binary that is using those functions will be those those will be imports in that binary okay so and uh so import data extension we will go debug information so if you are trying to debug the malware also debug the video program so all of the information related to the debug will be present in dot debug section and so usually it contains
file uh assembly line assembly to code mapping some other debugging related data so it's not very important to us so but there is some things that are usually needed in the debug for the malware and as we will go go into those details later okay now coming for the export data section so it's relevant for dlls so dll usually uh dynamically linked libraries if you ever playing games you might have seen some dll errors or if you go to c uh c windows and system32 you'll see a lot of dlls there and so basically what those dll library they have the they are like pre-configured pre-written code that any program can use okay and all of those like the details or the
metadata of all those is stored in the export data section in the pe file so and exported the sections are called by other modules xcdl etc okay so executable usually no they will call the functions from the dlns like uh if you need for example virtual alert that allocates memory kind of kevlar to malloc in linux so that's present in kernel 32.dll if you're if your program needs to allocate some memory it will import that function from kernel 32 dll which will be present in the export section of connected udl i hope that's clear so function can be exported by two ways by name or by ordinal so every dll can export function by so either they can
provide the name or the ordinal and so in case of ordinal they just provide a 16-bit number so every dl will have a ordinal assigned to each function that is being exported so it can be a specific number we will go into details later okay so this is this is a okay this is basically a screenshot from the practical malware analysis so why i included this directly from the snippet from the book basically i wanted to have or we wanted you to have a resource if you're confused about something you can just go to the table 1.1 in that book and read about it there's a lot of details surrounding this but since we will go to some basics so
name of the book is written here so so still one of the best book so and so colorless32.dll this is a very common dll that contains core functionality so every program or the every malware that runs on windows will have access to control 32.elf so it contains very basic functionality like memory accessing hardware resources and accessing files read and write functions advanced api so i most of these windows like uses services services are basically automate they start automatically and usually run in the background so if you see it was api 32.dll so it's using some import for important functionality and usually service manager registries all of these things are the functional related to these functionality are present in advanced
api so user interface component will be present in user32.dll manipulating graphics and next move on to the ntdl so this dll you won't be seeing much of it in the basic malware but when it comes to advanced malware you will be seeing a lot of this dls so this dll act as an interface between user land and the kernel so what it does so it basically provides an interface for all of the functionality that is being implemented in the kernel so if user need to some functionality that is directly implemented in the kernel so he will you he can use functions import functions from this dll and use so usually in common programs it's not present but if
the anti-dll you see some of the direct imports from anti-dll you should you should focus on them you should analyze them there might be some low level functionality there low level working going on there and the second thing the last two dlls they are really really important please always keep an eye on for the windsock dll rv ws2 or the v9dl these are the networking dlls so whenever you see are being present in the malware look for the networking functionality and it almost most of the time either one of the dll is almost always present in a malware okay let's move on okay so here like sorry so i will go through some of the basic
functions that you will see a lot in the malware analysis so these are all the functions like that you usually use by the malwares to do something or basic functionality so load library it basically loads a dll into the process so most of the malware do dynamic loading of the dlls that they want to hide from the static analysis so or maybe there might be any other purpose so load library if you see the library assuming it will be loading dll get block address so in windows so but just having a function name is not sufficient so what you need to do you need the address uh to that function before you can call it
so get proc address it does exactly that it takes the name of the function or the arduino so that we discussed before and and base address of the bll and it will return you the actual address of the function that after that you can call that virtual i look really really important you will see it being used a lot in the malware backed malware so it's virtual allergies due to the memory allocation so that's what's purpose create mutex create mutual exclusions objects perimeters basically whenever you see the create mutex it's basically a process what should i say a way for to sync up to create a kind of a sync up between the process to sync up the work that's the original
purpose of malware often uses it to make sure only one instance of the malware is running so if you see the cleared mutex please pay an attention to its parameters usually the create mutex pro make a very good indicator for dynamic detection so please pay attention my albury is using its launching in the process get host by name okay is used to perform the dns so if you have taken a networking course in your university you will know this you will know this function get host by name it's basically dns lookup is debugger present so i included this uh this api here so most of the time the malware what they do they try to detect
if they're being debunked so this is one of the most basically it's provided by the windows so if you see is debugger present that's always the indication malware might be trying to check if it is being debugged so and it might be uh and so malware use a lot of protection mechanisms and one of them at the end so at the end i have provided the appendix a practical malware analysis you there's all of these functions you can go to appendix a and read about them so in what he has done he has found some of the basic functions that they can be used and that's most commonly used by the malwares you can go there and read
about them okay now we come to the import section so it contains information on the metadata about all of the function that will be used by the malware okay so it's very important to analyze it it gives you an idea of what the malware will do on the system okay for example if you see on the so let me highlight it oh fun sorry one second uh full screen just again so if you see create file write file set file pointer read file close handle so if you see these apis are present in the import section of and malware so this will give you idea this malware is on this malware it's going to interfere
with the with the file system so it might write file it might read file it might do that and these are if you see this type of wss startup get id or info socket bind except listen so it's going to give you an idea this value might do functional you might do networking so like and load library and get proc address if you see these two apis in the import section so this will give you the idea okay this mile that might be doing dynamic loading or resolving the loading library at the runtime and calling the function at runtime okay so let's move on to the next section okay just just give me one second i'm
just trying to okay okay p file format demo okay let's let's do let's go through the demo and i show you some of the basic details uh i think we can delay it after two slides just let me go through two more slides and then we'll do the final demo we can combine okay offers created our pack code so like about 90 percent of the times malware that you will find in the field will be packed so they will like pack malware is basically they write a wrapper program so that's basically pack that basically compressed the malware compressed all of the malware binary into a new program and then it have a stub that runs that
malware for example this is our original executable it will get packed so whatever the backward factor will do it will compress it and then preview and then put it here in a new binary and the wrapper program wrapper program will load this packed executable and run it so why the why malware author do that so it's an easy way to defeat the static analysis or make it hard for the malware analyst to do the analysis there are many common packers available that commercial packers are available and malware authors often write their own packers to make the job even more tough so you will always have to be look out for on the lookout for these
packed malwares and okay so there are some indicators that also if there are only two imports if you see only two imports load library and get proc address so the malware is most likely packed and in some cases there will be very few imports so usually a malware usually have 30 to 50 yeah at least 20 to 30 imports at least a normal malware if you see less than that less than 10 so most likely the malware is packed okay so that's the common rule okay windows registry i think the ping guys who work in forensics might have a pretty good idea of this but just let me give you a basic overview the windows registry is basically a
hierarchical database that stores low level settings for the windows operating system and the users so it basically contains the configuration data for all the users operating system so the window registry is divided into hives and these are some of the most important hives so h class key class root core windows core window settings and like it contains information but very core window setting like if you click on dot txt file which program will open it or if you open dot doc file which program will open in this type of information current user it creates it contains configuration for the current user like what type of desktop he's using what is his background okay does he open his text file sublime text
notepad plus plus or something else some things like this that are user specific local machine so it basically contains information for the user software and the operating system so it's basically a local machine is like it contains all of the low level settings for your hardware and the software and mostly all of the operating system like what are the services and things like it so hkey user so it can contain for example if your system have more than one users so h key users will contain information about all of those users and just one thing i want to point out that the current user so this one hk hd current user is a symbolic is a symbolic link a symbolic link to
one of the registries in the hk user whoever user will be logging in this will point to that user from this current config so it's just it's just provide a shortcut to this proper registry hardware profiles that contain basically hardware configuration so just provide a shortcut or easy way for the program to access this registry and so what so that's the one like one thing i have done is like so all of these links are clickable and what you can do if you want to know more about these please head over to this link and learn about them i highly recommend you guys to go through this in this workshop we don't have time to
cover all of these basic things but please go through them okay so how the malware abuses registry so that's the one of the very so this is one of the very good question so achieve persistence so one of the key thing that malware does they achieve persistent using registry so this is the see this is all of the labs are the malleable training material that will go this is the one of the most common registry that will pop up what it does if it you can set this its value to an executable and whenever the proof system start it will automatically run that executable other than that so i go through a lot of there a lot of
other ways for malware to abuse the registry so this contains all of the registry settings in this link you can go through this link and how the malware can achieve persistent school registry settings okay next so there have been some cases where the malwares try to store configuration so they store configuration in the malware in the registry sorry and also a lot of services such as av especially the antivirus firewall they depend on they depend on settings stored in the registry so what the malware does they try to modify those settings and try to disable the av or malware can also create services using those settings from the registry and so hides code in registry so there
has been a case of the malware that tried to hide it code in the registry like it's completely stored it executable in the registry and the wrapper program will every time access that registry decode the code decode the value and run it so you can going to go through the malware more details that here so okay so registries are like one of the most miter attack techniques so miter at what they might i'll just give you giving a brief introduction miter is basically uh they have a database of all the techniques that are used by the attackers during a compromise so they have kind of systematically organized them and given them proper name and the code
so if you go here so modify registry so these are all of the apt groups and how they use apt groups are the malware and how they abuse the registry settings please go through this and this will give you a pretty good if you go through all of the material in this slide it will give you a pretty good overview how the registries are being used by the malware okay so now coming if i may if i may stop you here so we we had a question on our discord channel for you so we discussed packed and obfuscated binaries before right so the question was would you like to share your approach on how to deal with actually reverse obfuscated
uh dot net binaries and auto id binaries okay uh for scattered binaries and auto it binaries okay uh this is a question binaries to be sure okay so this is a little advanced question so uh so what i do is like uh what's the dn spy so just let me just i think just five minutes one minute so so this is the flare vm that you guys installed so if you go into dotnet so dn spy is the tool so one other thing is like dn spy you can basically open them in d and spy and analyze it from there debug it d for dot is the another tool so that basically uh d offer skates all
of the off scripted binary dot net binaries so uh we can go into these because these are a little advanced topic for this workshop but the person who is asking this question please ask him to reach to me on the twitter or linkedin and i can share more details so these are the two tools apart from that a lot of manual analysis is also involved and that we do for the dot-net binaries and these are all the tools that are we usually use for autoit binaries so okay uh let me here there must be an automate uh so you first decompile them and usually after decompiling those binaries you will receive uh let me just search for auto
yeah how to extract it so you upload load the binary here auto extractor and then from there you extract the binary code convert decompile from there that code is usually obfuscated and that requires like writing your own custom script to de-offer scale that script and from there you can analyze it so please uh ask the person to reach me on twitter i will share some more links with him uh about how to analyze these binaries in detail and i also try to share some videos with him okay sure okay let's move on okay basic static analysis so all of the things that i have discussed so far they all come in the basic status so these are the things that we will be
looking for a malware in the static analysis hash file type file metadata compile type signed unsigned so compile time is usually gives you a very good overview uh whether the mouse or rather than where the vendor megabytes compiled in an actual program but in malwares don't rely too much on it it might be uh what should i say it might be fake and sign and science so most of the time you will see the malware signed if signed by microsoft yeah you don't need to analyze it if it's signed properly signed by microsoft it's most likely alleged binary so if it is unsigned okay some of the malware are also signed but their certificates either will be revoked
if it is signed by the revoked certificate you should definitely analyze it it's malware packed we will go into detail later so strings so in the strings we look for file names network registries commands and import exports resource sections so what it contains in the resource any other normally that is present in the malware file so that's the static analysis we will go we will discuss all of this in the demo okay let's go to the demo okay so okay what i will do is
so for the lab analysis so what i'm doing i'm going to practical malware analysis so all of these labs are present must have been present on your machine already and these are some of the i think best labs for the malware analysis to learn math so we will be using some of these resources and some of the publicly available resources for static analysis i think this will suffice okay so here are the labs that we'll be going through and so yeah there let's go into the flare via these are the tools so utilities you go to utilities and we will be using these tools for the static analysis they contain so what i do very first time
xzp info so you open the xpe info and load the zm8 so it will try to give you basic information okay it was compiled using microsoft c plus plus version and not packed try only dbg or version seven okay okay look it's telling us this malware is packed or protected our lab three is protected self write code and now okay so it also guide you some if you it don't it was unable to find the packer it's asking you try some other program but most likely this is a custom packer if you see this message most likely the custom packer you can try these programs but mostly for in the case of the malware this will be a custom packer
let's go into okay it's telling us the uk's markers okay and it's also telling us and packs and pack this using from this tool okay let's check this out okay not pack and this is a dll okay microsoft we just do not okay now let's i move on to our next tool we will go into so the next tool that we will be discussing is the hash calc uh it's easy for the if you need to know the hash that's what that's all it does but it can be pretty easy to go i would always whenever you're analyzing a malware i would always recommend you to google md5 sha-1 and short 256 at least someone might have already analyzed it
and you can collect the hashes from here now let's move on to our main tool so pe studio so there are other tools but i find this tool to be honest the most easy one for the beginners to learn okay so let's go let's load the dll first just want to start with that okay let me okay so what it will do it will give you some indicators like pretty good the file reference is tagged as blacklist so kind of a view indicator also like what if what if it has already find and it's what you think is might be malicious it might try to give you some directions so yeah you can go here but the main
thing so let's go to the first hour p file this is a dos header okay so this is the dos editor uh details of the toss editor and dos tab file header so these are dos header and dot stop so usually we don't really bother with these unless we really have to usually make sure that this program cannot be run in the dos mode this string is present so if this string is not present or if something else is present that doesn't look like this that might be a good indicator for you to watch out and we can use that in the detection that will come later so this is from here the p header the p
header starts so this is the four five five zero this is the p is like it's code and it's telling you machine is the intel it's containing all the number of sections are for compiler timestamp it's telling us this program was compiled in december 20 2010. so might be true might be false but even if it's in the future it won't explode it's if it's the future it's faked most likely and if it's in the past most likely it's correct but don't rely on that in case of the malware and processor 32-bit through dynamically telling you whether it's executable dynamic like really or not so it is a dll yes telling you through executable okay
debug script have debug information present optional header so these are basically different fields in that pe header so entry point this is one of the most important so the entry point usually tells you from where the code start versus the offset of the code so it will be useful to you when unpacking the malware other than that what are other subsystem in the second thing it can be gui rc ui so it tells you basically in which subsystem the program will likely most likely run so either in this case you can just double click it in the explorer because it's gui if you see cui then you need to run the program in command line what else is there like
less of the like these are some advanced options we don't need to go into these details that are not important for us okay directories okay these are directories like this basically every uh pe file have directories which we did not discuss in detail but you can read more about them in the document that i linked to the slides but for this workshop week i think we can ignore them we don't need to go into these details okay sections the most one of the most important part so what it tells you so here we found out that in the file header the number of sections are four okay now this is the section table that gives you metadata information after
so it tells you text section or data section data section these are pretty common sections so if the sections names are not these so if they are something garbage or some not ordinary names so please reach out so you need to my malware might be packed or it might be or it might be obfuscated so the most important fields here are like raw address raw address is basically tells you where this section starts in the file it tells you the offset and raw size so on disk file the file that is actually present on the disk so yep so where it start what's the size of it virtual attack this basically states when the malware will be or the malware
or the file will be loaded into the memory then where this section will be present so the loader will load this section at this address the size of the section will be here and because it's a text section it also have information about the entry point okay and these are the characteristics writable executable okay this if you see our text section usually it should not be writable so if you see the right tables in front of dot text section so most likely that's a packed malware or for skated malware always look and i keep an eye for that so blacklisted okay this is also answered with the information so data so it should always be writable
relocation section that deals with basically uh if basically location section i will it be if you mail where if you know the advanced concept dslr so that basically deals with that it's every time the malware will run or the program will run it will try to load it to the uh different address and these relocation will help in that for our purpose this workshop or purpose we can ignore them okay so what are the import what are the libraries that basically imports so libraries it import dll kernel 32.dll msvcrt.edu imports so we come to the imports okay i told you this is the one of the most people this tells you what the malware does create mutex open mutex
you should go there and see what does what are the parameters that will make a very good indicator for for dynamic detection and you see twenty three hundred and fifteen eleven four nineteen so these are the ordinals what it is telling us the male uh the malware did not import these functions by name but rather than it imported this function using uh ordinal number 2315 11 four nineteen so yeah so most of the time whenever the networking apis uh you see the networking apis basic networking api they will be imported using ordinal malloc sleep create process okay it tells us the create process here one thing i'd like to mention like that's i really like about pe studio is like
it's refer you to the miter attack technique so you can just google this attack code and it will take you to how this process how this uh api is being abused by other malwares close handler just okay these are string compare okay that's good awesome this i don't have any exposed strings oh yeah this is the sec after imports this is the second most important uh second most important sections and while doing the static analysis so blacklist what it does it kind of tells you the blacklist so it has some uh p studio have built in blacklisting feature so whenever it sees some string that might be malicious it will put it in the blacklist but
don't rely on it just use it as a guidance so ws to their dll and create browsers why it is saying them blacklisted because first one is a networking so we might reach out to network second one create plus might create a new process rest okay this is an api iip so keep an eye for that that might be connect to this okay and let's move down okay what is this so i would like to go through like these are the this is important so i don't know what it is but we can go into the code and in one static analysis we basically relate to these close handle kernel 32.dll string compare okay a message trt okay we'll use okay
it doesn't have that much string okay now let's move on to our second binary i will try to keep it okay just let me download it
oh yeah okay so you see i will go quickly so it finds some url executable location oh yeah there's a in the resource i told you the malware uses the resources so it tells you that there is executable present in the resource section okay we'll let you know how to extract it okay attack ratio okay utilities privilege okay url pattern okay let's go to the dos header dost file header number of sections are four and you see dynamic it's not a dlp so you're saying it's false sometimes so this world is the here it's a bit busy the extension that mentioned it's an exit but in case not there's no extension so this flag be
really useful for you to whether it's a dllr or it's a executable true optional header from here you can see basically uh what's the entry point entry point and gui subsystem is the gui okay now we go into the sections okay the section names are common dot text or data resources and raw size raw address we can have already discussed these libraries what are the libraries that imports so it also tells you basically windows nt kernel 32.88 was api so advanced windows 32 msc crt and imports let's go into the imports that would be really awesome so what i do is like usually blacklist what i do double click on the blacklist and see okay open process
token look privilege adjust token privileges so if you go into the practical malware analysis appendix a and read about them so these are the privileges these are the apis that are mostly used by malwares to obtain some debug privileges or change the basically security level of the malware so if you need to inject do some code injection or need to do some high any tasks that require extra privileges it will use these functions other than that win exec that is used to execute some another window executable create remote thread used in code injection okay so size of resource find resource load resource okay this all means it's kind of extracting something from the resource and loading it the right file okay
that's and then okay load library get proc address okay it will do the dynamic linking also the dynamic api resolution let's go to the string okay so all of these strings looks really interesting let's just go through the blacklisted one first okay url moon so this basically dll name that is user networking so kind of okay enum process in a process whenever the pro malware need to find out what are the processes running on the system this is one of the api that malware can use let's move down okay okay i will i would like to google like these two strings so either if it is a windows executable if it's not a native window
executable uh i want to know what the malware does with these two so this is very important so either malware drop itself there or the malware might be accessing this institute i don't know i will need to google it first so why i'm telling you that because don't afraid to be google you you google is your friend when you're doing static analysis okay system32 this is the practical malware analysis so most likely this is okay updater.exe you see most likely this will download this file and win exec tell me it might execute this file okay resource section win up system again again so let's go down library okay close handle okay okay these are the format strings so
many of the any of you guys were familiar with the printf so always pay close attention to the format strings if you find them in your malware so in the advanced static analysis they might be useful so you can basically find out what the malware is trying to store in these rest okay this is not anything resources okay it's executable okay we see there's an executable in the resource section let's see how can we expect it okay so okay so there's a tool present here it's called resource hacker
okay just load your executable and here it is so what i can do right click save bin resource little window will pop up let me save it to the desktop so dot min i'm just giving you the dot mean extension okay so i have extracted it and what now what i can do is load this file in dot pay okay now i can basically do the static analysis on this okay practical manager analysis dos header stub won't go into detail basic okay it import your own dll imports url download to file and win exit so you remember in the indicators you see this update dot exe a full url to executable and in the import section you see url download your
file so most likely it's going to download that file using this api and the win exit that is one that executes the windows executable so you already have a good idea okay this manual will download this my download this file and then execute it okay that's good and strings okay temp path okay then these are the two screen that i might like to check further okay same so might be it might drop the file there or uh it might be trying to modify i still need to google right so windows your download to file your own okay same thing that's my guess okay awesome one thing that i want to do now is so let's try and see some of the packed
malware how they look so like utilities xp info
okay self write code so let's load this binary into ph studio
okay good okay the location of entry point is suspicious so impact malware most of the time we will see the anti-location of the entry point will be point to somewhere that is not present in the file on the disk so that's a very good indicator the malware is packed okay okay and now location status now okay text is unusual windows program okay that is also unusual if you go to the desktop so it's not a full usually this program cannot run in uh in windows uh and this program cannot cannot run in dos mode usually that's the full string but this one is interesting so it's a anomaly and other than that what we see okay i
think this function references type dynamic link library it might be dll so let's see in the dash header file header so now dynamically link library flag is false if science keeps true sections okay name you see in the previous two binaries the actual name was present dot data dot code but here there are no names that's also very suspicious and usually an indicator of bad malware one thing notice that you notice raw address this this size is very suspicious like raw dress size is zero another indicator of packed malware and we need to find so we need to find there is no section that is marked executable that is also interesting at least in the
proper binary there will be at least one section that will be marked another good indicator of back malware and all of the sections are writeable in our previous binaries we see we saw that the dot text section or the section that contains code is not writable so all of them are writable okay another good sign of packed malware let's see 28c 662 bytes another section another thing that i want you to so here we don't have the like we don't know which one is the code or which one is the data section so if in the most likely this is the i'm assuming this is the code section why because after doing a lot of male
analysis from my experience the core section usually start from four zero one double zero you will guys develop this type of instincts after a couple of years so what i see is draw size is zero but the virtual size if you see twelve 000 bytes if in the code section you see this this much huge difference that's always an indication of packed malware okay let's move on what are the imports oh you remember in the slides i told you there are only two imports load library and get proc address this is another indicator of an algorithm being packed strings okay there isn't much in the string just couple of strings that's it so this is this was the pack malware
so the packer for this most likely is custom packer and we cannot analyze this malware static you cannot do the more static analysis unless we unpack this malware unpacking we will go into detail um we'll be doing doing a detailed analysis of the pack malware so for the static analysis we can just write it's a packed malware we can't do further analysis so okay so let's quickly go through another another malware that i want to see which one was upx so let me just see the sections oh yeah upex the location of the entry part is suspicious again this is indeed packed malware okay and let me see what others signature upx the signature has been
detected signature upx so okay it will also tell you like so far upx malware so if you see the upx it's the most common packer it's perfectly legit you'll it has legitimate uses but it's mostly used by the malwares and file header so what we wait what you want to see here now it's executable not dll optional header okay let's see system here previously it was gui here you see console so it will run in the command line and sections okay upx now you see most of the package what they do they write the custom names of the upl custom names for the sections uh so upx 0 upx 1 and the upx 2. and
here you see again the same thing raw sizes 0 bytes and it's 16 000 bytes so huge difference between raw size and the virtual size this means the malware is packed and it's executable writeable and executable so in a normal binary a section that is executable will not be writable but in a packed binary it can be so that's another good indicator it have two sections that are both writable and executable okay libraries okay it imports when i want api msvcrt in ports oh you see less than just nine imports yeah i told you like normal malware usually have 20 to 30 imports normal programs or the normal malware which are not packed so that's another good indicator
and virtual alloc and virtual protect and virtual free so these three also have proper use but if you see there are very few uh imports are present and the import that start with virtual are also present in them so that's a very good indicator the malware is packed so these these are another indicator because what is a virtual alloc will allocate the memory for the binary to be unpacked and then once the binary unpacked into that memory watch the virtual protect will do which will protect me change the permission to make it runnable so once so this is the purpose of these two and load library get already discussed this create service so that's basically create service create
service on the window system we will go into details later so internet open okay networking api strings let's go into the strings okay so okay yeah seven blacklisted string so one thing you need to be careful about if the malware is packed you need to be careful about the packed string looking at the string they might not give you much information or they might try to mislead you most of the packet what they do they they include a lot of what should i say like fake strings to divert your analysis so look at the string with a grain of salt take all those strings with the sorry with a pinch of salt sorry so okay we import library okay
mind your http might want to check this out but that's okay it's a pack malware nothing much okay so these this was the basic static analysis okay there is one another tool that i want to discuss with you guys that's really good for p there i will quickly go through that too let me load this point so it basically does header so you go through the door setter what it does is basically also shows you the actual actual hex data and it kind of highlights all the fields so magic number so what the p studio is more beginner friendly this is more advanced level two so it will actually write the actual name that are being used by the loader
so dost up so if you go into the dos tab but there is the dos header general richard general okay this is a dos this program cannot run this is a smart dossier empty headers so anti headers rich headers pe file optional header file header intel machine okay these are the basically so it will tell you okay this is the signature file header so you when you select this file and it's like this file header okay optional header so this is little advanced use but this actually like tell you if you when you go into the advanced analysis this tool will be really help you to modify these values or check for any anomalies so windows
gui it will also allow you to modify but since you also need to know what you need to write there so optional headers yes shows these section headers section headers okay it also gives you a very good overview and it also allows you to modify them okay okay text sections imports so give your imports so you can modify the imports if you like you see and our data read-only data resources so it will tell you the resources what are the resources offset and you can modify the offset content so yeah pretty good our data resource section okay that's like just wanted to introduce this tool for advanced users if you need to modify some value in the pe file
and you want to do some advanced analysis so yeah the pe beard is the tool to go for other tools pe detective i won't go into detail you can look at the mp view and it's there are some other tools i think [Music] api monitor okay cyber chef i think this this is pretty much it p cff explorer yeah another great tool just just one thing i think might be this also this will also allow you to modify so but you should click here characteristics so you can modify the flags so one of these like 32-bit machine world uh file is executable so you see in the p studio we were checking in the file is dll file
is there so basically it's determined by this flag so you can modify this flag using cf explorer but also virtual size so you can modify these values import directory resource directory it also provides some other tools dependency walker and might also provide you to a resource editor you can add more resources through it quick disassembler so just want to give you introduction okay now okay that's that's all for this static analysis i think it's gone a little longer than i wanted it to be so now we have sorry sorry to interrupt you again since we had a question from someone in the audience that uh there are two tools pe id basically and die which is detect it easy so which one of
these do you prefer to detect uh packed samples and i believe he has said that uh di which is directly easy does have updated samples or signatures basically to detect such samples so which one do you prefer and why so okay uh so detected easy the both are like detective easy and the pe id so p id is a pretty old tool so it was it's also discontinued and signatures are not actively maintained it does have signature for example if you go into details like fsg and delex microsoft so yeah nothing found sorry and so what was the actual visual studio deep scan look it's not able to tell just look it's a upx packed
binary and if you're going to detect it easy so just wanted to show you a little discrepancies might that might be present in different tools or something what's that left okay i need to go to pmlabs
players
okay packer so you see nothing found but here packer is found so that's the basically p-i-p id the old tool and i would i don't use it regularly to be honest i also don't use detected easy but it's a pretty good tool and strings it can extract all of the strings and calculate the entropy so if you see a very high entropy that means the malware is packed and let me see what's the entropy for this so basically it goes up to seven like so the semi-drop is usually very high the normal is three four five maybe saying five is like the normal malware uh normal samples if you see seven it might be packed
and other than that what i think yeah so scan is complete options general theory so yeah so for me i usually personal view so the both of these tools are good so i won't recommend you to use pe id due to the reason that i've shown here but what i use is the xp info so this is another same tool that have the same purpose so i just find it pretty easy i think it's kind of also guide you where to go so that's my preference also have some like overlay entry point uh water let me uh what's what are the what what is the basically rip so rip so we're usually whenever since you we have started that so what
you can do let me show you uh another functionality that's why i like the psvp info so you remember we had to go to the resource hacker let me try uh searching for file encoded with base64 end of the file xzpe detected at offset okay close so if i drop it here continue and after that upload the file layer andrea so it's basically dripper it searches for xz and encoded file and you can basically extract it directly so you see this is a new file so the file that i extracted through the resource hacker the xzp info has a default way of doing that it will search for it will also search for some of the
encoded files like v64 and also doc file and and then a cff explorer you can actually directly open a lot of programs from it quick unpacker you know extractor trid run options first i'm sorry okay so these are the full quicker you know cookie in a packer click on packer shell needed now so yeah so this is my favorite program to go for but again this is the uh this is personal preferences if you want to use the detected easy go for it if you want to use the peid use it but be aware that it might not detect some of the packers yeah yes i hope that's clear all right thank you for answering shady
all right so if uh any if anyone else has a question you might want to ask do join us on our discord server and we're going to cater to your questions there so this is so basically we finished this section so if you have any question regarding any of the previous slide this is the time to ask so just going through again okay no okay so i'm hope uh so i hope all of you guys have access to your lab documents do you guys have so if you don't uh either you can put you can message on the youtube or in the discord and we will provide the link to download so this is the time for you guys to go
through the lab one so you have 15 minutes to do that and that should be more than you know okay so the time at this presence my time on my screen is 9 44 p.m so we will stop this around 9 1 or 9 two or sorry ten one or ten two okay if you face any problem during the workshop doing the lab please uh post question to discord and youtube so and hassan we can ask me directly question i will answer your question okay have it
just yes
now
uh
uh
um i said if anybody asked any question please let me know so i was out for five to ten five to six
minutes can you hear me uh sorry uh do you mind repeating your sentence i'm saying like if anybody asks any question so i'll relate okay so awesome
awesomeness
i will do no problem so while everyone is preparing for their lab assignment and things like that we will have a lot of like just a little bit of time so my question was like i am not someone who does the malware reverse engineering but again something like a beginner what other books would you suggest for people who want to get into malware analysis other than the book that was suggested in the beginning of the site so okay the question is basically if you're periods like uh it's not a malware reversal but if you want to uh start the manual analysis so how can you answer so basically the main purpose of this workshop is exactly this
so if you go through all of those resources that are we are sharing throughout the core lab and you do all of the labs and do the readings required so you will be you will be at a very good position to be honest it will it might take you a couple of uh one or two months to go through all of the resources but if you do that i'm not sure you will be at least a medium level and so in the belvedere practical i highly recommend you guys to basically use the practical malware analysis so that book so let me go to that book sorry so this is still like the tools that uses some of the
or some of them are obfuscated but it's still a very good book for the core concepts so um especially you can skip the chapters based on all your dbg and scope this chapter that are based solely based on tools except the ida pro you can skip it and but other than that the chapter from 11 to i think 16 or 17 they go into the really detailed analysis and they do all of its labs it also it also provides solutions and apart from that we will also recommend some of the channels youtube channels that you can basically go and watch and so they have they shared some of the cutting edge malware analysis techniques and
analyze some of the cutting-edge malwares so yeah so the answer to your question is follow the material in this workshop thank you so much richard that was pretty nice explanation to my question and again something let's be very honest being someone who hasn't even interacted with malware and having this much of resources to learn it's really really really nice to have such workshops and again i would suggest the viewers who are watching our stream and people who have just joined it just uh this is something you can get more uh advantage of it as much as you can and just shoot your questions at discord uh at youtube and anywhere you guys wanna question and beside management teams or
people who are volunteering here could answer your questions so over to you chad okay thank you okay guys do the workshop for the lab and let me know if you have any
questions
uh i think that there's a guy on the youtube he's unable to find muhammad unable to find the lab link hasn't can you please share it okay so if you have concerns related to the lab links we have actually shared it on our discord channel again please do join us on our discord server and i will personally answer your questions there really to the lab links only
five more minutes
much
okay so richard while uh people are trying to solve the exercise there was a question from someone on discord so is there a possibility of having signed dlls or executables as malware yes uh so they are actually uh pretty common so what what the malware why why the malware uses that so basically it's one of the ways to avoid some basic detection so some of the engines uh if they see that malware is signed especially some from some stolen microsoft certificate uh from stolen some reputable company certificate even if even then that certificate is revoked so that can basically defeat some of the basic static engines so yeah they answer the question yes it's common
and to be honest it's on the rise so i can uh if cooperson like self says you can just google a signed malware and you will see a lot of blogs from multiple reputable organizations
so uh while you are answering this question about the certificates being stolen and then using the malware so do you think the apts that are actually targeting uh such corporate organization um try to intrude in these organizations uh through many of the other ways and then you know extracting their certificates and signing them so that their malware can uh you know be one of the undetectables so is that is this something like i might sound a bit new but if this is how it is or uh the plans or uh the uh the movement or the way apt interacts or entities actually work is different uh i guess you're muted sorry so oh yeah sorry and so the what
the some of the most advanced apt groups on the planet what they does so they try to break into some of the most used software uh companies for example and there has been an example of avast so cc cleaner is the software that i think you all would be aware of so so if you go into if you can see my screen so in that happened in when so basically a vast network in 2019 or somewhere around that influence so in 2017 or 2019 someone broke into the arrest and basically they stole the certificate and they yeah added their code into the vaccine you know and that basically then got updated and this you all of the
organization which were using ccleaner were vulnerable to this so yes it is done commonly and but usually if you see a legitimate certificate being used on a malware that's a little rare because it requires compromising some big organization other than that signed malwares so gooey so this is from trend micro this is the brush nyers cryptography guy so yeah so this other than malware commonly these use self-signed certificates so that's pretty common so yeah
yeah hey does this go to the detail attackers are using so malware with valid certificates
okay that's i hope i answered your question yeah thank you so much well that that was something very interesting this was something uh i knew about stuff like that but again practically experiencing it uh what the examples are displayed about something really fascinating okay so yes yes it is it is really interesting even i think in latest in the amd also if i remember correctly amd drivers heck so i don't know some of the some of the actualization got hacked also so i forgot the name so yeah it's a pretty common and so i guess here you can just google avast avos network hack rcc cleaner so that's why that was one of it about from there these sell signed
malwares and with schneider he goes into really good details
uh lab time is over so by the way just very like mentioned in the chat how many people were able to answer like 70 of the questions just want to see like
uh listen did you see any replies uh not not really actually i believe people are still uh trying to solve the challenges okay
okay guys i think uh we need to stop it here so after the after when the workshop is finished and we can go through those lab if you are if you are stuck we can go through that lab again and right now we need to move on to the next chapter next topic uh the time is small short so okay so moving on to the next topic
so the next the next skill that we are going to be um we are going to go through is like assembly language overview so knowing the assembly language uh is a fundamental skill for required for malware analysis and all of the code that we will be analyzing most of the code that you will be analyzing from p files or the executable will be in assembly language and so understand that understand that how how it works and how interacts with the system is really important so i will give you a brief overview of the assembly language and i will try to cover some of the main instructions but it's not possible for me to cover assembly language
in a half an hour session because it's such a pretty pretty wide uh pretty wide field and so but i will refer you to some trainings all available online video trainings where you can go and learn and also refer you to some books so you can basically refer that and this is uh learning assembly language is one of the hardest part of being a malware research being a malware researcher so if you feel stuck don't don't get this hot so it's like almost every malware researcher who starts in start starts continue will find it hard to master the assembly language so let's start so first of all let's go some of the basic details of the
32-bit architecture and so in 32-bit architecture we have a couple of registers so like they're called x86 registers so eax ebx ecx edx [Music] and esi these are general purpose registers so for like up to from eax to edx you can access them using multiple way if you use the al if al is being used it is only accessing the lower by lower eight bytes of the ax register if ah is being used uh it is only accessing the byte from like eight to fifty now the the lower or lower double word or the lower 16 bytes is successing the topic bytes and as if you use the ax it will access the all of the bytes so
why do we have this this type of addressing or this type of access so it was basically to was to do the backward compatibility like windows can still run 64-bit 16-bit binaries at the dossier binaries so that's how it so the dos used to industry there was used to be only 16 for 16 bits so this became 32-bit in 32-bit register that's why we also call uh operating system like windows 32-bit because the register size is 32-bit so it's same for ebx ecx bx okay so now they're coming to the esi and edi so they don't have access mode as general as these registers but what they do they are usually used in string operations array operations
okay and if you go to we won't be discussing them here but if you go read any of the training i'll go through any training that i will refer you guys to so you will definitely find how these are used esp and ebp okay these are the two most important registers so the basically uh every program that we run on the windows have a stack so ebp will donate the start of the or the bottom or from the way the stack starts and esp will donate the top of the stack so if you worked in data structures so like you can do the push so whenever you do the push so esp esp will move will point to the top
element and ebp will point to the bottom element so in terms of data structures if i explain it to you guys so let's move on to our first instruction one of the most common instruction is move instruction so what it does like you have a destination operand and a source operand so uh like you can just assume an arrow going from 0x42 to ecx so when this instruction will be executed the ecx will be set to 0x42 although 0x42 will be moved to ecx this is a hexadecimal integer and so one thing i like table 4.1 from practical malware analysis so why so you can go to that page where the table for part one is
and read more about it if you don't understand but i think it's pretty simple what all it does whatever is in the source operand it will move it into the destination operator so there are multiple ways here you can use move instruction so register to register if you want so what it will do it will copy the contents of ebx into the eax if there's a constant here or literal value so 0x42 will copy that us so if you see the brackets if you see brackets uh that mean it's basically accessing the the the value inside the bracket will be the address so it is accessing the value pointed by this address and copying that value into the eax so
copies for value add location into the ex and so if there is a register inside eb uh inside the brackets is mean that register contains the value of the address so when this instruction will be executed wherever the ebs points four bytes will be copied from there into the eax and you can also get um like you're also allowed to get a little creative so ebx so for example if you need to access the array ebx will point to the base esi and multiply the four so it will calculate this expression so whatever the address it will get it will access at that memory location and copy the four bytes of data from there so it is mostly used in arrays this type
of addressing arrays or some continuous data so usually ebx will point to the in this case ebs will point to the bps and esi will be the index and the four would be the size of the data so for example integer are usually four bytes so success the integer array this type of addressing will be common after that we go into the arithmetic instructions to subtract so what this does it will subtract whatever the value is present in the e x it will subtract the value that's right from the destination opera from the source operand and eax minus 0x10 and will store the result into the eas okay so for example if eax had 0x20
and then this instruction is executed after that eax will have 0x10 okay so add similarly it will add two values and store the result in ex the ebx will not be affected because it's the source only the destination register will be affected so result will be stored in here x increment so in cc plus plus you must know about plus plus uh plus plus operation so that's kind of a assembly kelvin so it will increment the edx by one minus minus decrement so it will increment the degree uh it will decrease the value of the acs by one again if you don't if you feel any confused so this is chapter four practical manner analysis i can read
more about there okay let's move on to some of the other instructions and zor e a x r is basically it a bit wiser and your gears are gates and ignoring your university you must have that these operations are so what it will do it will do the czar of a source register with the destination register and then store it into the result it will store the result into the destination register so zor have a one specific property if you saw something with itself the result will always be zero so instead of using m o v move e a x zero so compiler will usually do the zor e x e x that will clear the ex register it
will set the existing value to zero so why the compiler use this way because the size of this instruction is smaller than move ex so it gets a space of optimization so you will see this instruction a lot whenever you see this instruction assume the register is being set to zero and r e x this is basically the same operation so e x it will or the e value in the e x with this uh with the this has a decimal number and then store the result into the e x okay so if you see here it will move the ax into one and after that is shifting left so you must know the like double
uh what's like double arrow symbol in cc plus in cc so that's basically implement exactly that so two registers so the instruction is 0x28 because of the zero one zero so one two bits left is so zero x a is one zero one zero if e x is okay sorry okay sorry uh yeah one zero's binary is 52 bytes left okay if for example if uh we had one zero one zero in the ex register and we shifted left when we shifted left it will add two more zeros into the register so now it will become one zero one zero this is old value and two more zero has been added because we shift left two times
move bl with zero and rotate so in that case whatever value there are 32 and 30 31st bit so in terms of naming the bits so naming the it's the same as the renaming house array indexing so 0 bit will be the first bit and 31st bit will be the 30 31st will be the last bet total size of the register is 32 0 being the first index and 31 is the last index so rotate the similar operation that you must have learned in the university so like when you rotate something so whatever the value is present in the at the 31st byte it will move to the zero index so rotate the bbl two bits these two
result in bl if bl had been at zero one double zero zero zero so bl is usually lower part of that which is eight bytes is just accessing the eight bytes eight bits uh my apologies so eight bits and because it did two bits okay you rotate it once it gets uh irritated once uh this verb becomes one one and all of them are become zeros then you take it twice that this zero will also be added it'll become one double zero okay something like that okay awesome and so if you are confused please re go to the table 4.7 and read the text rounding it or ask a question on the discord but these are pretty basic operations
okay now we move to the flags so x every x86 processor have a flag register that basically can display the stills display the state of the register or the instruction that are sorry that are the instructions they basically tell you the state of the previous instruction so as a like this fill up there's a lot of flags that are present in the so far melvin analyst there are only three flags that we are concerned about zero flag carry flag and the sine flap zero flag whenever you see the instruction uh the result of the instruction was zero so for example if the subtract e x e x you are subtracting e x with e x
so it will result e a e x with being zero after this instruction zero flag will be set so carry flag is set when the result is too big to fill into the destination register for example uh let's go to this example so move ax so we are moving 32 bit 32 bytes all of them are one into the ex register and then we are adding one to it so the results cannot fit so result would be uh 33 uh 33 bits so it cannot fit so that will set the carry flag sine flag after executing the instruction if the operation or the result is negative for example you do two minus three so the result is minus one or
results msb is one more significant bit so more significant bit is the 31st bit so if that is one so it will set the sign flag okay so now we will move on to the jump instructions so jump instructions are basically used to uh implement if and else for loops and these things so whenever you need to jump from one address to the another in the assembly language you use the jump instruction the basic format of all the jump instructions from there before you will see compare and test can also be present here tsp est so so compare instruction it will compare the source and destination what this does it exactly subtracts source from destination but it does not
store the resulting destination it just sets the flag and throw away the result and based on those flags then this instruction whatever the jump instruction it will execute and go to the address that is present in front of it okay so if you go into the go so there are basically three main jump instructions rest of them are just their variants so quality comparison if you want to see both of these two source our destination were equal we use jump if equal jump is zero okay because if you subtract destination from source you will get a zero result that will set the zero flag and it will become the equal so signed comparison so also that there are two comparisons
for like uh if you you know while programming you must have noticed like sign and unsigned numbers signed inc is unsigned into a so for both of them their different instructions are used so jump if greater so if destination is greater than the source so it will jump jump if less than if destination is less than the source it will jump okay and and for these are the same jump if above jump if below so this but this is used in unsigned comparisons for example both the integers that you are trying to compare are unsigned so then these insta you will see these instructions okay so jump if above jumping below the same thing rest of those in jump if not
jump let's just adjust these are just very few variations of these instructions you can just click them here so just give this example for example compare e x to 10 jump is less than or equal to this will check if e a x is less than or equal to 0 x 10 it will jump to this address okay i hope this is clear and if you have any questions up till now please let me know i know it's a little too much to take in but if you have any question please post on the discord okay moving on okay so here we will see some of the x86 uh summary language core snippets and we'll try to see how they correspond
with c language code or the actual code so here for example x is an integer so we move into the e x so e x will be equal to x now then compare e x with zero so it's checking if the eax is 0 or if the x value of x is 0 if it is jump if not equal if e x is not equal to 0 it will jump to n so it will come here and start executing here if it is equal to 0 it will move the eax one it will set the ex to one and then come down so then it will increment it and then setting the value of the
storing the value from ex back into the x variable so and how it will look into the c language code okay if x is equal to zero so this this two instruction so basically uh represent this if x is equal to zero so what it does it will move e x 1 so x is equal to 1 okay otherwise it will don't execute if it's not equal to 0 don't execute this block it will simply increment it will just increment okay and then story so let's move on to next okay so here we are setting e a x to 10 and zor e c s e c x so i told you whenever you see this
instruction you need to that's basically setting ecx to zero and then call do something call some function that does something and then increment is increment the ecx and then compare the ecx with e a x so in the first e c x we have value one because we just incremented it and then it's comparing it with the ten so jump if less than yes it is less than 10 so it will go level one again do something again increment so it will become two again compare no still less than gain jump you see there's a there's a loop going on here so let's see how it look in c code here for i is equal to 0 i is less than
16 plus plus i do something so that's a capital so 0x16 when you convert it into the decimal it will be 16. okay and now we move on to the next code construct so we move the eax set the ex to x and then we are comparing if e a x is equal to 0 x 0 a if it is not equal it will jump to l it will increment e x and then execute the code for example if it is equal to 10 or 0 x 0 a that will be 16. my apologies so 0 x0 is 16. if it is equal to 16 in decimal so it will set the ex to 0 and then jump to end so
that's how it will look okay so what will be if eax 10 is set equal to 10 and just the condition so that's what else if it is not equal to 10 so here if it is not equal to 10 it will take it here and it will increment it will just increment it and then it is gone okay up here now if you have any questions please post them in the discord because we are moving on to the another topic
okay main memory layout of program so now we are going to basically discuss how the program will look in memory because that is important for us to understand next assembly instructions so this is very basic overview of the how program look in the memories it has data it has code it has heap it has stack so stack is basically used for local variable uh to store the local data heap is used for whenever you do something like malloc or you use the new keyword in the c plus plus all of that data is being allocated in heap and so stack usually grow from so it usually goes heap so stack and heap they grow so stack will grow from
here to here and here we go from here okay and the function calls all of the function calls that we have each of the function call have their own stack frame because if you know each function can have its own local variables and data that it needs to do its functionality or do its work so all of these are stored on the stack and they are kind of look like this color stack so cut stack frame if your function isn't present in this stack in this function stack will be at the top the function who called that function caller so it will stack will be below it and when we go one level down so caller caller stack frame this
basically contains all of the variables all of the data that are local to the function so let's go into the more detailed overview of each stack so what is contained so we know all of the functions or most of the function need arguments so the stack frame will start with the arguments so one two so the first argument will be uh the last argument will be at the bottom and the first argument at the top and then after that return address so whenever you call a function it need to store where it needs to return when the function is complete so that address will be stored here and old ebp so ebb basically points to this value or dpp it will save the
old dbp it will point and it will be used as a reference to access these variables and after a local variable the function have local variables they will be stored here and esp will point to the top i told you okay let's move on okay so void my function into for example we have this function which has three local variables a b c and this sets these variables to 10 5 and 2. okay so basically this what is this this is epilogue of function so at every function you will see push ebp and move esp into ebp this sets the stack and just create a new stack frame for the function you will see in front
of every ad start of almost all of the functions so and subtract esp12 so when the function is called the stack is created up till here now then we store the create a new frame evp point when you store the first instruction is executed and so it will be ebp and from here so now both ebp and esp point to this if function have local variables it will allocate space how to allocate space you simply subtract the number of bytes that you need from the exp it is subtracting 12. so we have three integers abc and so each integer size is four bytes 4 multiplies by 3 is 12 so we are subtracting 12 bytes from esp
okay and now that is how you access that so basically so now we are using ebp to access these variables so one thing you notice if we go to the top the address are decreasing so if we need to access something above ebbp we need to use a minus sign if we need to access something that is below ebb we will use the plus sign so since we are accessing the local variables and local variables are present above ebp so we will use the minus sign ebp minus 4 this is the first variable so 10 we are setting it to 10 second variable evp minus 8 it's a location of b we are setting it
to 5 and ebp minus we are setting it so you just add four four or the number of the size the number of the bytes equal to the size of data that you are setting so integer are four bytes four eight twelve let's move on okay how the function is called so you knew how the local variables are stored i told you like it will give our ap now let's see how these variables are set so for example this is a assembly code that this is a function my function two it takes three parameters in text into y and into c and someone calls this in this uh c vote my function 10 5 2.
so how that code will look so one thing you need to notice the parameters from the end will be pushed first okay so we'll push to push 5 push 10 and then you call the function how the stack will look when the push two so it was two sorry it will see two here then push five will push five push that the call function so what does the call function do it basically takes the address of the next instruction immediately that instruction that follows it and store it on the on to the stack and then pass the control to this function okay so that is how the arguments are passed so we just looked at this fashion from
argometer to auditor up till here okay so one minute so for this i think i will need to do a little bit of okay so now let's see how they when they are put together how they look for example we have a function like my function three that takes three integers in text into i and c and it also have three uh variables local variable integrating to b and c okay how it will look in the memory so that's the code of the pusher this is the epilogue operation so it will present against in every let me see if i can basically zoom it oh it's becoming smaller
okay okay so we can do it i think therefore so same thing subtract e c x e c here so x is the so integer x so that is how this function will be called so z so that's what i want you to do is to kind of fill up the stack in front of z then y then x and after that when you call the next function let's let's assume the address of the next instruction is copy here so it will push here okay now we call this function the control has been transferred to this function the call push the address at the next instruction and control is there push abp here it will go the old ebb value
and esp will end in esp so esp will point here so it will start it will kind of set this sorry here it is setting the eabp all dpp first string so that's what they are doing okay and after that we see esp minus 12. okay so one two three esp will now point here um
okay okay it's not visible but let me see format option just like for time being okay this will point here yes so yes we will point here now we have space for our three variables so that will be a b and c so okay now let's see the location with respect to ebb so over ebb is pointed here
and so x see you add plus 4 and plus a plus 8. so x is present at ebp plus 8. see why so i told you if you are trying to access anything below the ebp register you use the plus sign if you're trying to access anything above the ebp well you use the minus sign so then here 4 8 y is present at 12 okay and now if you need to access z so ebp plus 60 if we need to access a it will be evp plus 4 and b ebp plus 8 and c ebp plus 12. okay and at the end of the restriction so what you see here these are the stock
stack uh function uh epilog i belong this is this is where this is how the function usually terminates prolog so and it will basically destroy that these two instructions will destroy the stack and we set the ebp to whatever the value is the return value and so it will set the here and then basically return what it will do it return these three instruction will destroy this stack okay and then since there's a present 12 12 is also present so this is a standard calling convention so it will this whole after this function is execute this instruction this three instructions are executed so your esp will be pointed somewhere here below this that's the whole stack okay
i hope that is clear if that's not clear please ask questions on the discord because this is the most important part of the samdi language okay okay okay now this is all that we will cover in somebody language and so basically chapter four five and six of the assembly language they deal with this so they discussed this concept in detail apart from that uh this is a really good book oh this side can't be arranged okay so you can just reverse engine ring for weakness let's google this so let me just just want to show you this book reverse engineering for beginners so go
trips okay it's available in for pdf so you can download it in pdf and it goes into great details how to this is like a huge book and it covers all of the assembly language in great detail but it also covers the mips and um so if you are basically concerned only about x86 so just stick to the x86 and ignore the rest so but this use this book as a reference so if you try to read it from end to end uh start to end it's pretty pretty dry lead after that this is a disassembly block apart from chapter four five and six i highly recommend you guys to go through this so what it does is like it gives you a
pretty good idea like x86 assembly so assembler compilers and after this windows executable platform code patterns so how the loop looks variables so some of the example example in our book if you go into my slides the last couple of examples so these are all so if you see at the bottom all of these examples were taken from this ebook and so yeah i highly recommend you to go through this chapter four five and six and
use this use this book as a reference and if you are not into reading and you want to basically take a video course so there are these two excellent courses available on assembly language x86 so these are one of the excellent resources for to learn something language i found i myself learned from this this uh security open security x86 so when i was starting malware analysis back in 2015 so i went through this complete training it's pretty small will take you one or two days max and if you are if you really want to go in more detail you can also learn x86 64-bit so that is also good and this one i don't know currently it also have i
think it also have videos on our back then it did not have video so that's good so yeah so that is all for the assembly language so if you have any questions please post them on the discord if you don't we can start the next lab
no questions i think so it seems like you guys understood it all or understood nothing
okay then let's start the lab so go to the lab open the lab document let me let me let me also open this on my machine
yeah so yes there are two exercises so i have done like a very simple giving given you very simple exercises so all you have to do write a comment in front of each function uh each instruction what it does stating sorry my properties instruction stating what it does we discussed all of these instruction in our session and after that can you figure out what this code does so you remember at the end i will show you did if else for loops and so can you convert somebody language code to c code if you guys unable to do this don't feel bad summary language is really hard to learn and but stick stick with me and go through
the trainings and go through the practical analysis and you will be able in like in just a couple of months you will be reading somebody like it's just english language so the time here is 10 41 and sure yes you guys have 15 minutes so we will start at 10 56.
so okay uh i see a question on youtube is esp always lower than ebp yes so like 99 of the times yes so esp ebp will always point to the start of the kind of somewhere like after the it will always it will always be present above return address okay and it will find to that register and espb will always be on the top but one percent of the cases so if you are analyzing some really advanced malwares so they might not respect this basic structure at all so but that case is very rare and usually used in obfuscation or the packed code but for normal normal malwares uh unpacked code so this this is true
ebp will be below and esp will be at the
top
okay uh this is one question about from abdul sami do you really need programming knowledge to learn this thing yes absolutely yes so i if you don't know programming like i would recommend you guys to go through some ce course so most likely see course and learn from there all the basic basic code constructs and then move to assembly language because if you move without knowing programming this is gonna confuse you a lot
i think there are a lot of resources out there over the internet that can help people learn about c what do you say about this yeah take any course like take any online course go to udemy and take any online course that would be great so one thing like i just want to say the knowledge of c or c plus plus uh is essential for a malware analyst because most of the code that you will be analyzing are the so it kind of directly correlates to c integer sizes so c will teach you about the integer sizes how the effects work and so it directly corresponds to the c language because that's the lowest level high
language high level language uh lowest level high level language and it's really important to know that
so there's a question on youtube somebody is asking uh we have to flip downside overview i'm sorry we have to flip our view flip uh downside our view i guess they're doing the lab course probably uh we have to flip uh sorry i don't i believe i believe they're actually talking about the stack addresses that they start at a higher address and then they go towards lower addresses so we have to shift our view so basically uh usually that's uh why they that why the way it is so basically all of the malware analysis references uh uses this uh user used this way so all of the malware analysis books all of the blogs that will you uh that you will
read online have the stack in this way so lower higher drives will be at the bottom and the lower address will be at the top so all i am doing is following the same tradition so you will get used to it after some time i can understand it really it can be a little hard if you're a beginner but you will need to train your mind to look at an address like this
so shall we if people are not fans of actually reading do you have any maybe video material courses or something i see a lot of people asking that in the comments so yeah so basically that's uh if you go into open security x86 training so that's exactly for that so uh sorry um this is a lower one so if you go at the bottom so they have videos okay so videos and trainings both so here are the videos day one day two up till day six so i myself found it boring to read the x86 from the books because it's really dry and so i watched this video myself back in 2015 when i was starting as a
malware analyst
so i believe open security also has courses on starting and dynamic analysis is it yes they do and and i didn't take them myself but yeah sure go ahead and take them like they are so i can't really comment on them because i haven't taken myself but so other than that if you if you are really interested in some online course uh i think let me let me find one so if someone is really uh where is the training if i can find it i think trainings i think trainings and workshops like the current one that is ongoing is is something you get to know how to you know use the tools and things to get into malware analysis
right and it's when when you when you start it off uh you particularly mentioned about being practical or like utilizing it more and more the skills you have so you get to know about malware reverse engineering so it's more about uh doing the practices again and again rather taking courses and trainings what do you say yeah that's that's my that's my also like the take on it so malware analysis is practice practice and practice so if you just keep on going through the material you will have a theoretical understanding when someone hands you over the malware believe me you will be lost unless you do it yourself so some of the people were asking me for
like video course like a really detailed one it's a little old but i think you can google what's the name of it c into one two six practical malware analysis so yeah if you need any help with the learning any material from the practical malware analysis book uh this is a video course i would recommend you guys
again the purpose of this workshop is to give you a head start and provide you with enough resources to get started in the value analysis field
uh all right so there was uh one last question uh would you like to explain indian-ness so i believe uh i i don't know if you have uh explained this before or i believe uh so yeah sure sure so nvness is basically uh how the data is stored on the uh or in how the data is stored in the memory so there are two type of antennas little ndns and the big engine endings so the little ndns is usually that means the first byte are stored or at the lower address and as you go higher the higher battery store the higher and in big endianness is the opposite so but in for our case most of the
malware that you will be analyzing are the window based malware so window use little ndm little indian convention so just to show the other guys so how the little ndm look
look so this is a picture that explains it much better so the lower bytes go to lower address and higher bytes go to the higher address so the lower byte is zero d it will go to the a and then as you move higher go to that so this is little endian window uses this so all of the malware windows malware that you will be analyzing they will be using little india and big nbn so some of the mips malware are arm based malware or the iot based malwares they might use big endian and old version of mac os malware is also used big nbm so this is basically architecture thing so in that case
the higher bytes goes to a lower address okay zero a will go to the a a plus one b and the lower lowest byte is like zero d and if you go to the higher address so this is something you just need to know about it and not worry too much and but yeah knowing this will be useful when you will be directly modifying data in memory during your advanced dynamic analysis with a debugger right so we had one other question uh would you like to maybe share share some light on linux assembly and mason okay so all of the instruction that i discussed here so they are valid for both linux and windows so basically this is the architecture
instructions x86 is an architecture so both windows and linux use that so there are some otherwise other than that there are some differences but those are usually i would say minor differences uh like one of the way is like let me let me okay so what i did is the c calling convention i didn't really explain it and just left it for you guys to figure it out so most of the linux linux compiler uses the c calling convention so for example this stack needs to all of the variables that are present that you pushed onto the stack they need to be cleared before you can transfer the control uh before a function or the caller can start
executing its own code so in c uh in linux it will be all of the libraries that follow the linux calling conventional c calling convention the caller will clear the stack in windows libraries it will be cleared by the window or it will be clear by the my function so in windows you won't see
so in windows you won't see this instruction windows based libraries and so this is a minor differences but other than that if you know the x86 assembly language that will be applicable to both windows and linux another thing that i think if you're analyzing a malware that you might find in the sunday language so the api calls will be different for linux so windows that we have a sign of a static analysis we saw some of the api called like virtual alloc file read file right so these are the windows specific api calls linux has its own like f open lead write printf it's also present on linux but i also present on windows but
linux will use mostly these api calls so is it clear
uh yes thank you so much uh shah for the answer here's another question from someone uh asking about actually it's about your own experience in terms of malware analysis so so let's put this this way um dynamic analysis sandboxing how do you prefer while and analyzing your malware so okay so what i do like in a typical manner so whenever someone hand over me a piece of malware so what i do is like i xzp in for the tools that i showed you guys i run malware in that and then i see all the import strings if the malware is packed and after that what i usually do i submit the malware to a sandbox okay
and also open the malware in ioda pro so we will discuss the ida pro later in our workshop so and then kind of okay from ida pro i go through the code and all of the strings that are accessed so and then i see the dynamic analysis from the sandbox and what it is doing which instruction it is trying to access and which file is trying to create and from there i take a hint and then using those hint i start my analysis in the ida pro so once i have a good idea both from the sandbox and from ida pro like what this malware is doing then i will pop that malware in a debugger and
go to the code sections that are that seems essential to me and then analyze it from there so that is how usually i approach the malware analysis so if one thing i think i can mention is here if you i think let me exit it so i didn't basically covered it in my but there's a link here and okay so these are the four stages of malware analysis so lenny zellster is like a science instructor so yeah this is pretty much my approach also looks like so you can read more about the link is present here and you can read more about how he does the analysis or this is i i think almost all of the experienced malware
researchers uses this approach fair enough and thank you for the answer
so uh the time is up and so what and if you were able to complete the lab
anyone
hey
okay
okay there is i think one good question that i see from from the guy goes by kid cycling is somebody language is only applicable for executable and dlls okay so isambli language all of the even for java for net they all have their intermediary language so dotnet is called il il something like il language i forgot the name so but dotnet have its own assembly language type java has a byte code and a lot of other like uh other binaries like platform dependent binaries are that you they use their own virtual machine so they have their own assembly language or some intermediary language that we can call equivalent to assembly language so what so what you can do is like you
can learn the x86 language and the x64 language after that everything else it would be really easy to learn so all of the course concepts will be repeating in those languages and in most of the cases you won't even have to deal with those low level language for example java byte code there is a very there are very good d compilers available for net they are very good decompiler available but even if let's uh for for example you're analyzing some advanced packer advance packer and you have to deal with that assembly language so you can just use a reference that would be better so just learn the x86 and x64 rest of the rest of the stuff you can go
with the flow so there is another question can flair vm help to analyze pdf so let me go to flare vm um effective analysis tools sorry just go ahead there so yeah so these are the tools that you can use and pdf stream dumper is really good too and you can find some online tutorial for it even there are some very good youtube tutorial or the video tutorial available for it we won't go into detail in this workshop but you're more than welcome to check this tool out okay so i think so we are gonna stop stop this lab here and we're going to move on to the next topic and since we are short on time
okay so here we go now we are going to the debugger overview so what we have covered up till now we covered basic static analysis assembly language and the next step that we will go through is the debugger overview so the kind of is to introduce you to the debugger that is used for assembly language so you will be spending at the malware analyst you will be spending a lot of time using the debuggers so there are two famous debuggers one is the only dbg and xdbg so odbg is the one that is discussed in the practical malware analysis analysis book but it's a pretty old debugger and can for last couple of six seven years it
has not been updated so it's abandoned project so most of the malware analysts have switched to xdpg it's actually developed and actively maintained so i will that's why we also start we are also going to give you an overview of this debugger and its functionality if you are curious about all your dbg now you can watch some videos on youtube or read some tutorial that would be more than enough to get you started on that and so foreign when you open the debugger and load a binary this is how its interface look like so these are all the registers so let me open it enough so we can interact directly so this is here so there are 64-bit debuggers and 32-bit
debugger right present on your layer vm it was already installed and x32dbg
so let's and open so one thing that i would recommend you guys to do before analyzing a malware is go to options preferences and exceptions and from here 0 0 and ff please do this so what this does so debugger are basically used for finding errors in programs or so basically uh whenever there is an exception so debugger will catch it so but as a malware analyst we don't need to catch those exceptions malware and malware often throw fake exceptions to detail the analyst so what it will do it will ignore all of the exceptions so zero zero zero to f save it and now we can upload a malware so let me just go to chapter one um
okay so let's go to the basic interface so these are the registers all of the registers that i told you guys about eax ebx ecx ebp esp esi and edi the flags so we are only considered mostly concerned about zero flags sine flag and the carry flap rest you can just you know the rest of the registers okay it has a lot of information here and most of this is relevant to floating point instructions so we will not be covering those instructions in this lab so but if you know if you want to know about these what these registers do we can just google and know more about them okay so this is the register interface
all of the registers are present here so and next thing this is the cpu cpu window all of the assembly code will appear here okay you see and this is basically point to the current instruction that will be executed eip so eip is a register that points to the program program we call it a program counter so it finds the current instruction that will be executed here is the stack so if you see again like there was some question about uh should we invert the uh invert our graphics because the higher drives are at the top and the lower address or at the bottom so now we have why we are not why why did not i do that because if you see
even in this tool higher addresses are at the bottom and lower addresses are at the top and if you go up if you go bottom the addresses are increasing eight so c eight four so all of this convention is being followed throughout the malware analysis all of the malevolence is blogs and books so you will get used to it after some time so this shows you the memory and all of this memory is in little endian that's what you need to know and this shows that this is a context it shows the detail about what are the basically here we are using the esi it will show you the current value of the esi ebp minus four so we are trying to
access the memory that is present at ebp minus four it will kind show you what value is present at present is zero it shows the context here so these are useful so these are the function parameter these are useful uh when you are stepping into a call so you can basically look here and to show you the function parameters other than that uh breakpoints uh all of the breakpoints will appear here memory map so all of the dlls that are being loaded that are loaded by the loader directly or will appear here you see url dot dll is we saw the static analysis okay and their address size is what else is there to discuss okay this
is pretty cool so now we go to the what are the different basically how to what are the different main shortcuts so f7 and f8 so right now i'm pressing so i we are at the call f7 and i have this basically a single step through the instruction but they differ in one point so if you press the f7 it when it's an instruction this is called it will jump into the function okay and if you press f8 f8 it will simply execute all of the instruction in the function and jump to the next instruction okay so here i pressed f7 so we entered this function so let's set me a breakpoint because we don't want to analyze this function f2
so by pressing the f2 there will be a breakpoint here and after that i can press f9 when you press the f9 that means continue so it will keep on executing the code until it hit some breakpoint so now i am pressing f9 okay so it's hit the breakpoint that we set with f2 and after that we can either press f7 or f8 so let's press f8 and we are here so one thing that so f2 i remove the breakpoint okay i want to show you one thing let's reload the file so when you reload the file it will stop at some loader code and you will have to press one time f9 to go to the entry point
so this is when you see the entry point written right in front of the instruction that's from where the malware code start okay and so after that you can do either f7 f8 f9 for example let's assume we need to modify the register values so what you do you double click on them or you modify value enter and whatever the value for example i need to set it to so either i can set in sk signed value unsigned value expression like i can set one plus one okay so it will set it to two uh if i want to enter the bytes i can set f to modify value so ff so it will set to ff so it will
convert it it says show the xcs key as key how it converts to ascii value for example if i make 4 1 4 2 4 3 4 4 and four five and so that's basically the hectare decimal representation of abcd so yeah so that's how you can change the values of each register and uh in the stack you can similarly modify the stack values you can double click on it and it will show you this expression and here you can enter your expression for modifying the value in the memory you need to select the memory you want to modify for example i want to modify this line so i right click
edit now i can modify so either i can enter the value in hex i can enter the value ascii this is modified value so so you see ascii is appeared right here this is the modified value so you can present and so there are multiple views so for example you can multiple views you can add watch struck so these are little important little advanced but if you want to watch the value add some address so you can add it here so you just add the address for example eax ebx ecx whatever you want to enter you can also enter some address for example if i what i do is like i want to watch this address
copy address add paste
so this editor watch you should watch for this address let's see if it's like expression edit
yep so that's if you want to watch a memory address so this go there and yep this is pretty much
so you mostly in the malware analysis you want to be using the watch but the uh the option is available and you can use it and follow the bible documentation all right fpu so it will hide all of the fpu which is the floating point registers and a couple of things i wanted to show you some important things so let me go to the snapshot
okay so one of the interviewing viewers so i recommended you guys to install the vmware so the virtualbox they provide the snapshot functionality so you can whenever you're doing some analysis and you want to save the state for example you have been like done twenty thirty percent of the nation you wanna save the state just take a snapshot so that's here so for example like i have already loaded a binary into it and okay just wait and i'm pressing f9 i have already set the breakpoints
okay so now we are at the internet connect a so that's the basically call somebody else there's a call to that and std calls these are the parameters that are being transferred to it so if you google internet connect a so you will see like this one represents the whole server name that's connected this is the port number this is some flags so one thing we can do is like okay if i want to modify this so follow in yeah okay we are in the top for example you want to modify this value here right click edit let's do it drg not cc see the values change now it will connect to different server so and you can modify this
like follow in stack so all of these variables like if you see all of these also present on the stack so it what it does it makes it easy for you to see so here's the stack i need to modify the port number so this is the parameter i can basically specify for example that's 100 i want to connect to the port number 256. i want to 443 that's https or maybe 22. so that is how you can modify the parameters that are being passed to a function and control its behavior okay that's something just pretty much it and if you have any question about the interface about how to use different functions in a debug please let us know
in the channel
okay this is a basically a question from uh can we rely on dynamic malware analysis and sandboxes please okay i think it's already done okay the x86 debug so just to answer like you need to use all like dynamics tactic both of them so and also you will need advanced static advanced dynamic analysis so you can't rely on one so for example if the malware is packed so your static analysis will fail so then you will have to rely in dynamic analysis so uh if malware is like for in one of our binary one of the binary that we saw it has another binary in the resource section okay and that will only be executed during the dynamic analysis and
you want to be able to normally have that binary binary present if you didn't do the static analysis so yeah the static analysis can be helpful same is the same goes for the dynamic analysis the dynamic analysis and the sandbox analysis gives you an overview a very brief overview but there are many malware that that are that can escape that basically knows the way how to escape the sandbox let me in my slides if i go to my slides once again let me exit so in my introduction i showed you one of my blog increased use of delphi packer to provide malware classification okay a deep dive into regret so this is a blog that is the malware
that goes out of its way to detect the sandbox so you can read more about it how it does but it's a little advanced so malware can also bypass the sandbox in that case only the advanced dynamic analysis will be useful that you do with the debugger so the question to your answer you will need all of them and if you try to rely on one or two or maybe three of them you will miss out some of the many important values so the next question is okay uh the xcp buzz registers are showing 32 bit is that because 30 bit xe yes so if you go here under there are 32-bit and a 64-bit if you need to analyze the
32-bit binary you will use the one where on itself it's the 32 is written magne and magnifier so you see i just use the magnifier so 32 and the 64 bit is 64 bit and both of them have different registers
okay and okay next question is uh how can this memory analysis be helpful to catch malicious behavior so for example uh many many times the malware will and the question is how can the memory analysis be helpful to catch malicious behavior so many malwares mostly the packers what they do they unpack the binary in the memory you see let me see like if i go on the top i see
so at that time when you see like have some like mz file header let me just try to see if like the lab 1.4 had it so long memory map
you see okay 7 0c binary following yes so whenever malware will unpack binary you will see something like 4d 5a so that is another day this is where the unpacked bind is stocked and then malware will try to load this binary into the memory so that is where this pain or the memory analysis will be really really helpful apart from that i also told you like if you need to modify it for example follow if you need to modify the function parameters or some strings in the in the memory so that's where the memory analysis will be helpful so i hope i have answered your question and so when and how to use the tracing
functionality in x64 dbg okay a little advanced question
so i will just answer it as a basic because i won't go into the details uh so tracing is basically when you log all of the instructions that are being executed by the malware so for example uh when your malware is so i think omar will be able to demonstrate to you guys so tracing this question where we'll be able to demonstrate so how can tracing be used will he because he will be doing one of the string decryption so that's where the tracing can be really useful anytime when you need to know what the instructions are doing and if they are accessing some memory some modifying some data and you want to capture those instructions
in a log so that's when the tracing will be helpful it's mostly used in terms of the exploits like when you see where this exception is triggered and the malware switches to the exploits which is to a stack address or address present in the heap so that's when okay the opposite this instruction will be executed and then it will go either into the stack or into or into heap and so that's where the tracing is really useful other than that we will include a link i have included a link in the slide that will be really helpful for you guys so here is the link
come on
okay i will send you guys the link to [Music] excellent it's oh yeah this one so if you guys like all of them we just discussed some of the basic features and that you will be using every day but if you need to go through i have like a good understanding of all the features that are that are usually present in the xdbg and you will be you might need them with analyzing some of the advanced malwares so you can go to this link and read about it i think it might also have tracing
it's a pretty detailed blog so over the rest of the guys who are just the beginners i don't think so you need to bother about tracing for at least these laps but if you're still confused uh we can allocate some time after the lap after this this session and then move on we can discuss that so anyone else any more questions assume is there any question in discord all right so i had one question uh how do you analyze actually this is from someone else but how do you analyze malware which is utilizing doll bins which they're utilizing uh living alternate binaries for example maybe it's a medicinal dll which uses run dl 32 so i believe someone answered him but uh
that we have to attach the binary to the executable and then we can use it so i was hoping you could maybe answer that a bit more bit better sorry so no no no you should know i should regarding that so i think uh still couple of ways so far they're like okay do you really want to exit yes let's analyze the dll so basically local windows debugger i think we have a dla
practical malware analysis player utilities sorry labs chapter one look at this this is the binary so this is a dly
okay the first thing you can do is like use the dll main cmd run dll32.exe
and comma dln
so we just executed dln main is a function that basically uh every almost every dll has and it's really from where the code will start it's like you can say the main function of cc plus program so you can do this this is basically for basic analysis so if you just need to run the dll and see what it does you can do this dll main so missing entry okay and so other than that what you can do is upload it okay a little getting ahead of ourselves second thing what we can do only dbg let me open the debugger so all the dbg have very good interface for that file open
desktop so this is the other like older malware so is the dll windows can execute dll directly extract and launch dll yes so it has a built on built in dll loader okay let it load okay so close i like you will see xp feelings so this is the module entry point this is from the hdl code start so you can do the debugging from here but if you don't like it i think uh yes so the second way is to use xdpg yes and file open
and since we need to press f9 so okay it's star now from here the dll code start so one of the main thing dl has is there's another way so what i did in like in the ida pro video i will i have attached a video link in the ida pro section so we will discuss that how to analyze the dll using ida pro you can also do it with the ida pro and here if for example some dll have some functions so you can just write its name for example some function and provide the parameter after space so these are the multiple ways to analyze a dll or run the dln directory
one more functionality that i the xdbg don't have but only dvd have okay debug called dll export so this one don't have any dll exports but what it can actually do is you can basically load a dll and provide the parameters that is need so you can set arguments no arguments or the parameter call reason and set different arguments like argument uh four five six seven set the register before the call is executed and you can go through the different calls let me see if i can load a dll which have some um flare and i think in the system 32 to find system32
and he's not present he might not have access
yep here it is
okay so what i'm doing is like analyzing a basic for example let's assume at the moment this is the malicious dll that realizing so it's a kernel 32 dll yes oh no it's not a 32-bit i'm on a 64-bit machine okay i think uh let's uh delete under the lab i will find it to be dll and i can answer your question after that and show you some extra tricks absolutely that's perfectly fine
so does anybody have any questions any more questions
debugging a dll certain export function yep sadhi from sadia yeah so i just explained it so just to give you one more time think i have a deal on the labors
yep this one have i'm not sure of it so if you need to debug and export i would recommend you to use only dbg2 that's for as a beginner but once you have once you know how the export works then you can switch to the 32x dbg because xdbg doesn't provide a way to directly uh directly debug and export so but only dbg does so let's open here this dll and file open
okay so after that you go here call dll export okay so it see you it has three exports so for example if you want to debug install okay and
what do one thing you want to do is go there and set a break point otherwise it will directly execute it will not stop there so you press ctrl g so that is how you basically go to some code control g one double zero triple zero four seven zero six okay this is from where the okay start we just press f2 setup breakpoint and after that once you have set up all the function parameters arguments that you want to pass to the uh this function so how will you know about the parameters you will have to statically find them so that's where the advanced static analysis will come into play call export come on
okay you got it so click the call export and it will stop at your breakpoint you see and then after that you can do f8 let me close this f8 f49 or whatever f7 you can do so that's how you defaulted here okay any other questions okay if there are no further questions so i would ask you guys to go to the lab manual lab number three so it depends over you so it should take you like 15 to 20 minutes and basically ask you to do some of the basic stuff the time here is 11 39 so it will be i will stop at time at 11 45 11 55 or 12.
yep this is the last lab from my site and after that i will hand it over to mesh okay let's do the lab if you face any issues please stay after the workshop is like this topics have been finished and we can discuss the labs other than that if you don't want to wait we will also be releasing video solution to the labs later a couple of days after the workshop so you guys can go through them and see how to do these labs
look
okay guys so we are gonna call it a day today so if you guys want to stay and discuss some of the lab questions and or any other question extra question that you guys have uh any question related to malware analysis so we will me and umair will be here for next half an hour sorry about half an hour to answer the question otherwise if you don't have any questions you can work at work on lab at your own pace after that and you can so tomorrow there will also be another session we will go through a shell code analysis and i will show you some of the advanced apt attacks and how to intercept the traffic and finally if we
get enough time we will go through how to detect the malware
isn't any question on discord
so i'm not sure if you've answered this question from youtube already but uh can you maybe explain the process of debugging a dls export function yes i answered this question already uh so yes i'll use already bg2 and since if the person is still listening there is a way to do it from x dbg also so but it's a little more involved because xdbg doesn't by default provide a functionality to debug a dll so what you do here f9 and after that you execute the entry point whatever it's like so execute until you return from this so until the return address is executed so you can give the fully dll main and after that you go to the function
for example uh is my screen visible i don't think so uh nope the screen sharing oh sorry sorry sorry sorry for that screen share
[Music]
so i will explain the process a little so debugging a dll using xdbg but if you're a beginner i will highly recommend you guys to use only dpg i myself still use only dbg whenever i need to debug a dll export or i use the ida pro xdbg is a little bit more involved and the margin of error is very high so you load a dll from recent phi into the but you still want to do it here is the basic way i can explain it so f1 so you entry point you execute it completely until the return in three and three job training from anchor
it's terminated returns so we have executed the dll main routine so this code have to be executed before you can debug any dll export then what you do you you find the dll export address from ida pro or some other analysis tool so let me load this binary into [Music] ita pro
so here the exports install option view general line prefix and then you copy the address for example i want to debug this install so i go double click on install copy this address
and then ctrl g type this address and f2 okay and then right click here set new regions it will set the eip to point here okay and then you set all of the parameters and try to execute it but don't go this way use only dbgr.i.d.o
Related talks
 35:42
35:42 13:22
13:22 53:54
53:54 47:29
47:29 55:25
55:25 29:31
29:31